Business Content is a powerful feature of BW/4HANA that provides us with ready-made data models that are tailored to the business context and can be used flexibly for reporting purposes.
SAP Data Warehouse Cloud is now SAP Datasphere
SAP Data Warehouse Cloud is now SAP Datasphere
Since March 2023, it has been clear that SAP Datasphere is the next generation of SAP Data Warehouse Cloud. We explain what this means in concrete terms in our blog post.
The business content is also part of the SAP BW Bridge and is supplied without additional configuration. However, filling it with data requires connectivity to the ERP system, in our case the S/4HANA system.
Connecting to the S/4HANA on-premise system requires preparation and involves several steps. We will summarize these steps in a simplified manner in this blog, shortening your search for the necessary system information and showing you how to find it.
What you need for this...
To establish a connection between your BW Bridge tenant and an on-premise system, you need the Cloud Connector to act as an "intermediary" between the two systems. The Cloud Connector is an ABAP-based tool in SAP BTP that maintains data exchange and communication agreements between the two systems. Data is exchanged via RFC protocols (Remote Function Call procedure).
More Blog Articles from Our BW Series
Power BI-Connector: Enhanced Connectivity for SAP HANA Databases
The Power BI SAP HANA integration quickly encounters limitations. The ISR connector facilitates, …
If you have set up Cloud Connector in version 2.13.1 or higher, you can start connecting the S/4HANA system or any on-premise source system. However, you first need an SAP BTP account to configure Cloud Connector.
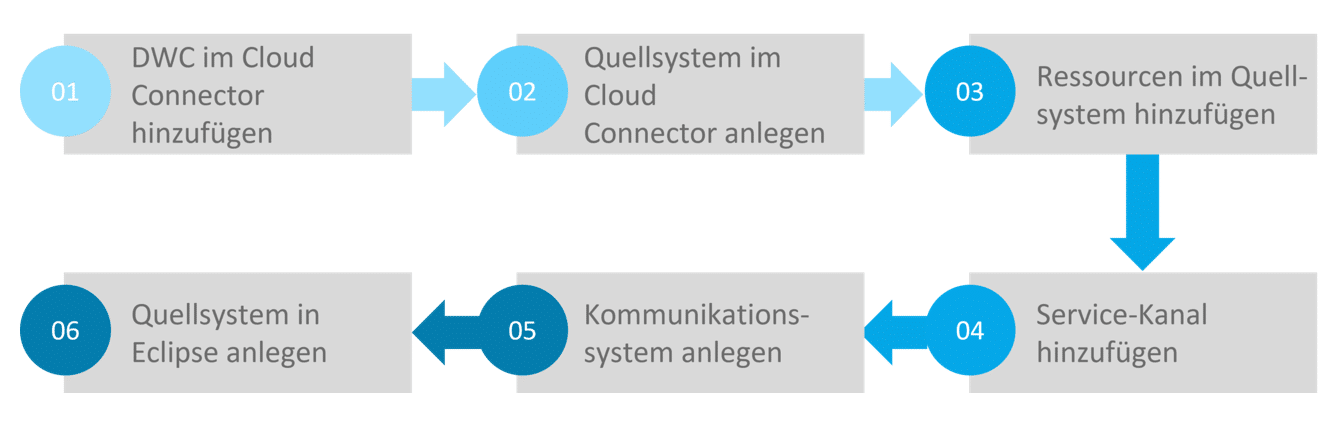
In summary, the process is as follows:
1. DWC in Cloud Connector as a subaccount
Preparation:
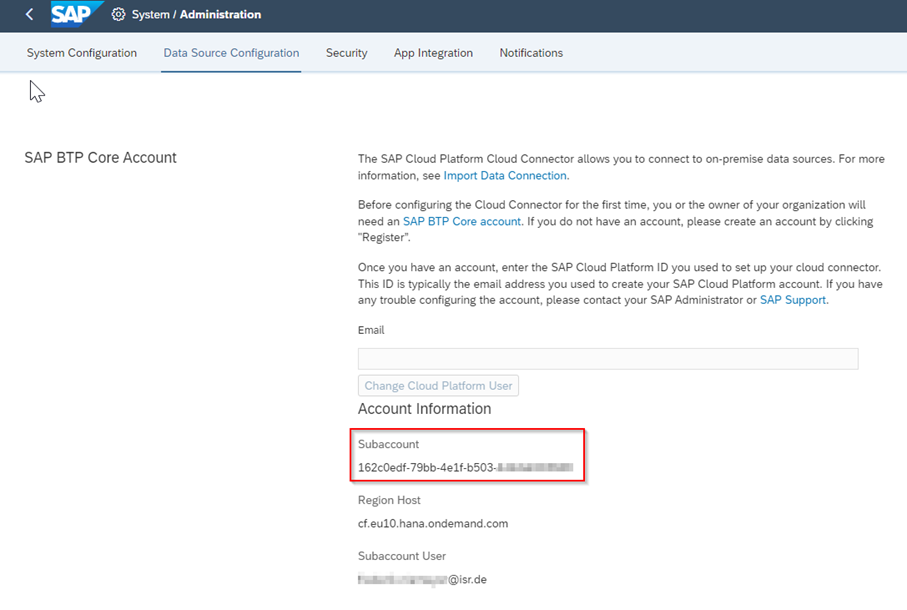
In order for the on-premise system to communicate with SAP BW Bridge via Cloud Connector, Data Warehouse Cloud (DWC) must first be added as a subaccount in Cloud Connector. You can find the relevant information in your DWC tenant under:
"System" > "Administration" > "Data Source Configuration" > In the "SAP BTP Core Account" field, you can copy the subaccount address to the clipboard.
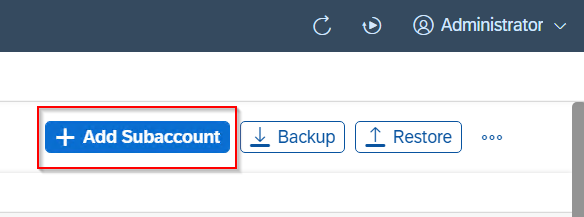
1.1 Now log in to your Cloud Connector Administration.
1.2 On the left side, open the "Connector" window and then click on "Add Subaccount."
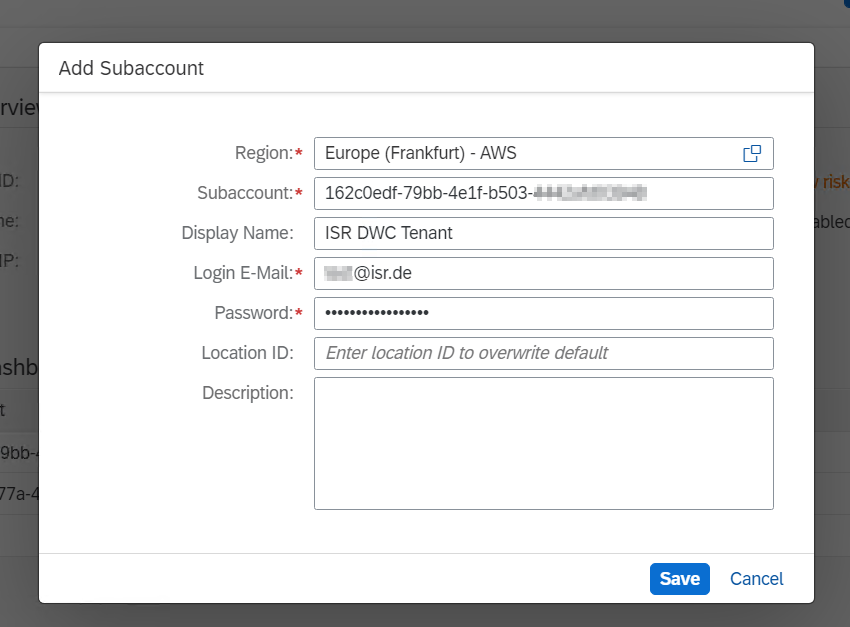
1.3 Geben Sie unter „Region“ Ihren Regions-Host ein. Dies finden Sie im gleichen Ort im DWC Tenant wie die Subaccount Adresse (in unserem Fall eu10).<
1.4 In the subaccount, paste the address you copied to your clipboard during preparation.
1.5 Finally, enter your DWC user data (email and password) and click "Save."
2. Create source system in Cloud Connector
Process:
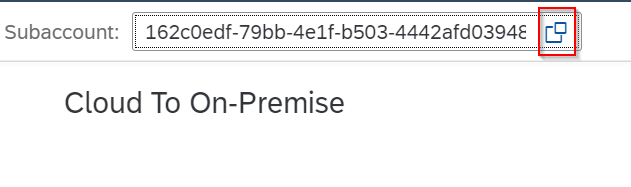
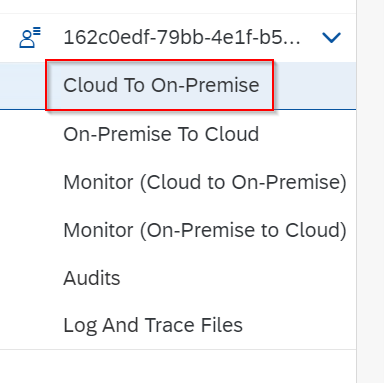
2.1 In Cloud Connector, select the "Cloud To On-Premise" option on the left-hand side.
2.2 In the bar above, change the subaccount to the subaccount you created in step 1 (DWC subaccount).
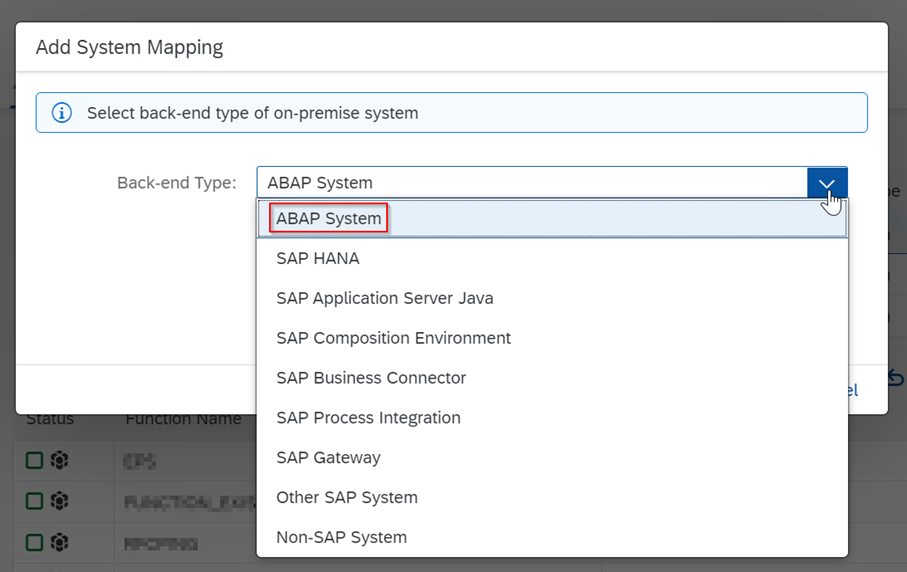
2.3 In the "Access Control" tab, select the "+" sign in the "Mapping Virtual To Internal System" field and add a new system mapping.
2.4 Select "ABAP System" as the back-end type and click Next.
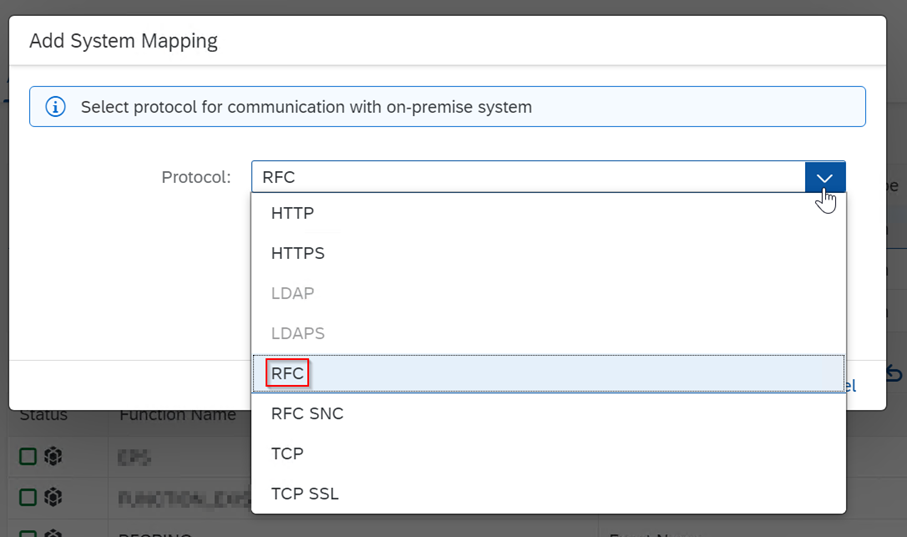
2.5 Select "RFC" as the protocol.
2.6 You now have two options to choose from: "with load balancing" and "without load balancing." SAP recommends the "with load balancing" option.
2.6.1 With load balancing: For this, you need a system ID and the message server port of your source system.
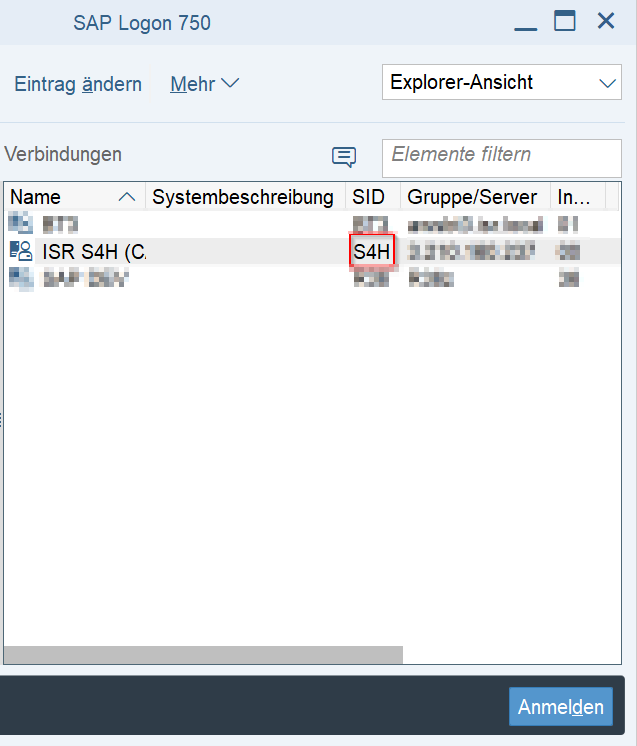
2.6.1.1 Communicating the system ID (SID): This is a three-digit identifier that you can view in your SAP logon.
If you still do not know the SID, you can use the port number to be determined in the next step 2.6.1.2.
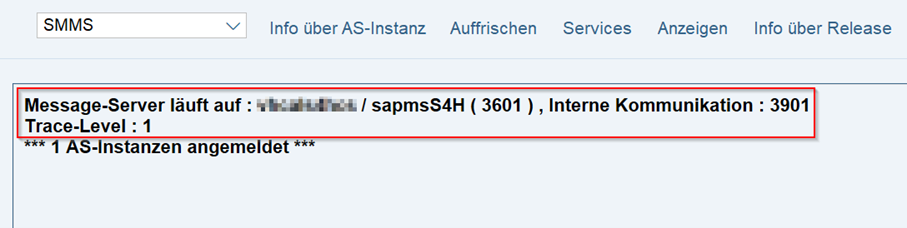
2.6.1.2 Assigning the ABAP Message Server Port: Call transaction SMMS in your source system. You will receive the following message:
In our example, the message server port is 3601.
2.7 You can leave all other settings at their default values. You can optionally set the virtual host and port as desired. SAP recommends using virtual addresses here, but experience has shown that some functions currently only work with real communication addresses.
2.8 Check the host and select "Finish."
3. Add resources to the source system
Preparation:
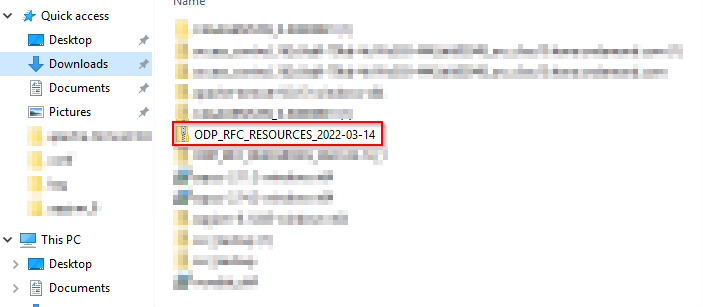
Download the required configuration file from this link.
Process:
3.1 In Cloud Connector, select "Cloud to On-Premise" on the left side and switch to the subaccount you created.
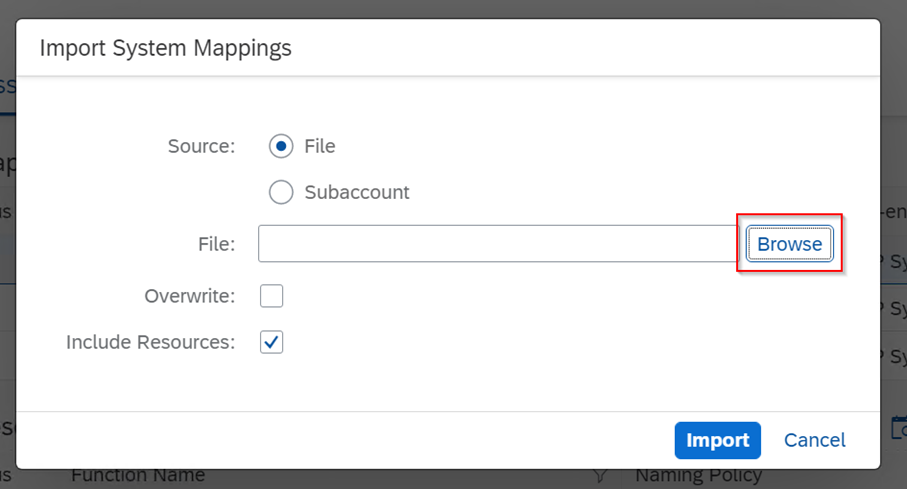
3.2 Under the "Mapping Virtual To Internal System" field, import the configuration file downloaded in step 1 by clicking on the "Upload" icon and browsing for the file.
3.3 Finally, click on "Import."
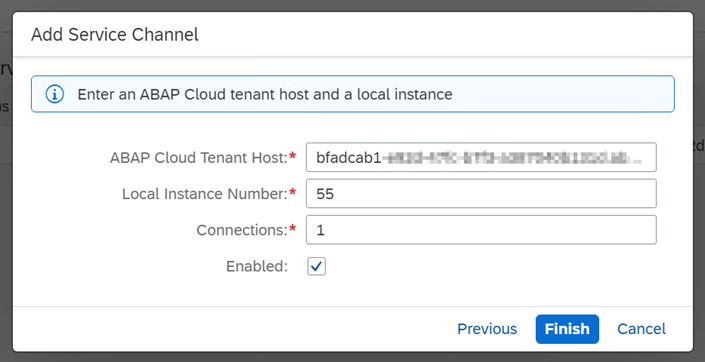
4. Add a service channel for the bridge
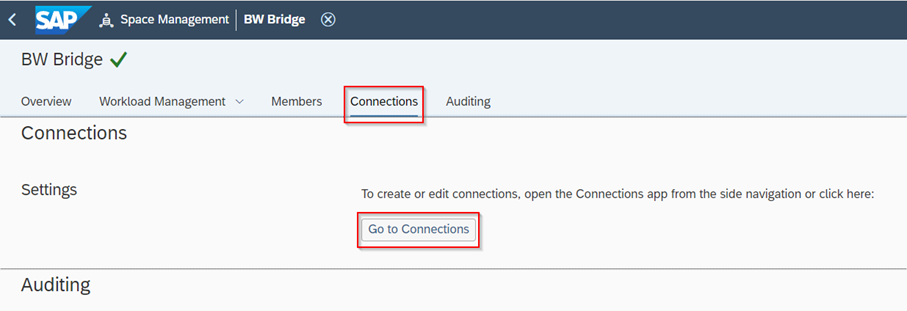
For this step, you will need your DWC hostname. To find it, go to your DWC tenant at:
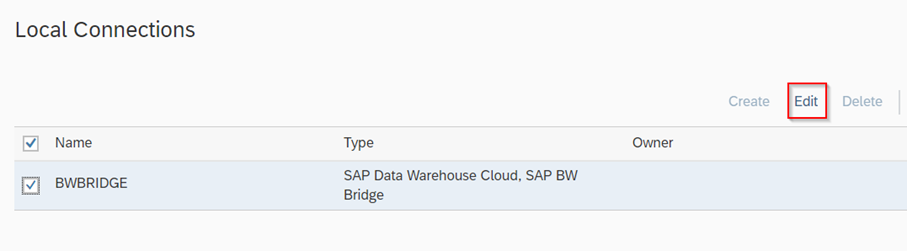
Space Management > Your Bridge Space > Connections > navigate to your local connection and then "Edit":
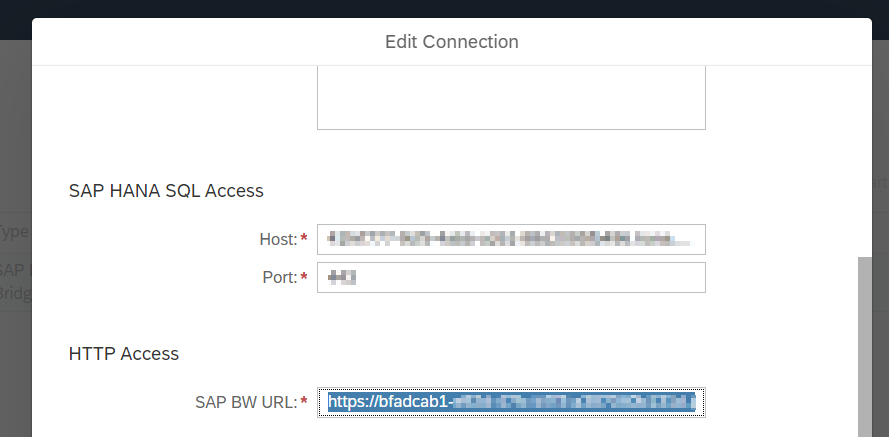
Copy the link in the "HTTP Access" text field.
Process:
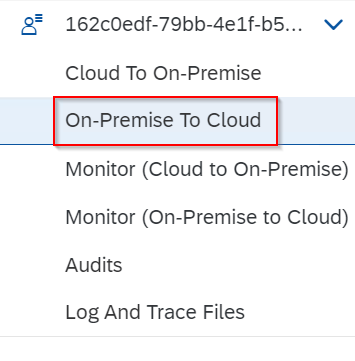
4.1 In Cloud Connector, select the "On-Premise To Cloud" option on the left-hand side.
4.2 Switch to the DWC subaccount you created.
4.3 Add a new service channel under Service Channels.
4.4 Select "ABAP Cloud System" as the type.
4.5 In "ABAP Cloud Tenant Host," paste the copied HTTP host name and remove the https://
4.6 Enter any instance number between 00 and 99 as the "Local Instance Number" (however, it must not already be used as a port number on the Cloud Connector).
4.7 Leave the rest at default and press "Finish."
5. Create communication systems
After preparing the bridge in Cloud Connector for communication with on-premises systems and adding it as a resource, there is one last step in the preparation process. Namely, adding a communication system in the Bridge Cockpit itself, which allows you to specify the technical communication data.
For this purpose, we require the following technical information:
In step 2.7, the virtual host name you created (or real host name, if applicable)
Instance number of the source system: You can call this up using transaction SMGW:
In the Gateway Trace file, you will find the line: Bind service sapgw00 (socket) to port 33XX. The instance number is the number that follows the number 33.
Source system client
Process:
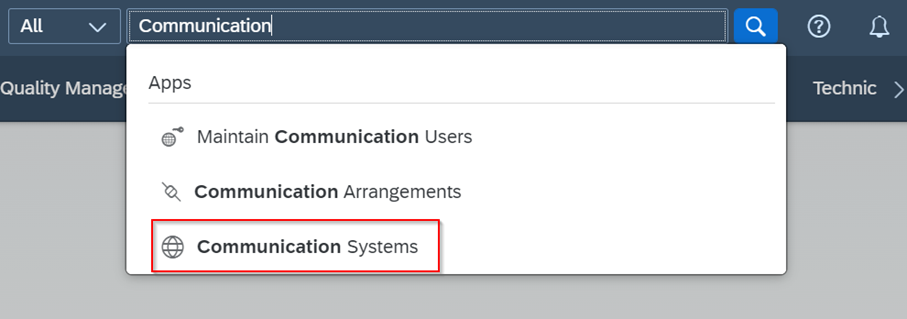
5.1. In your BW Bridge Cockpit, search for the "Communication Systems" application.
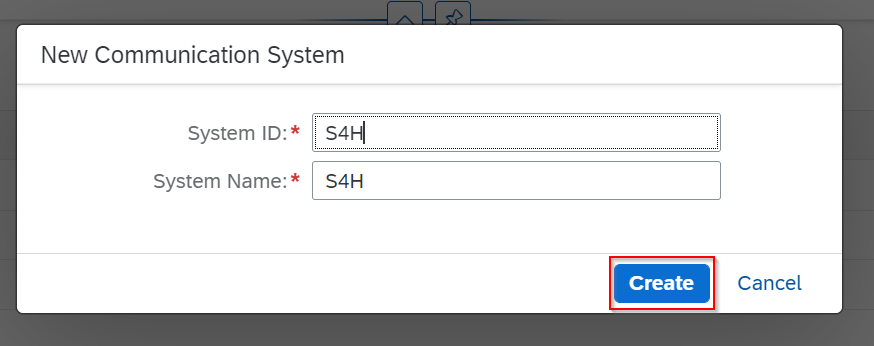
5.2. Press "New."
5.3. Enter a unique ID for the system and a name, then press "Create."
5.4. In the "Host Name" field, enter the host name from the Cloud Connector.
5.5. In the "Port" field, enter the instance number of the source system.
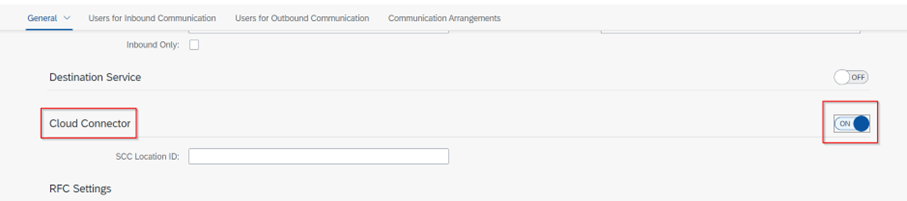
5.6. Turn the "Cloud Connector" feature ON.
5.7. Enter the client number of your source system under "Client."
5.8. If the "Load Balancing" option is enabled:
5.8.1. Create a logon group for the source system and enter the group under "Group." You can maintain groups under transaction SMLG.
5.8.2. Enter the (virtual) system ID stored in the Cloud Connector as the "Target System."
5.8.3. Enter the (virtual) message servers stored in the Cloud Connector as the "Message Server."
5.9. If the "Load Balancing" option is not enabled:
5.9.1. Enter the (virtual) instance number and the target host of your DWC tenant.
5.10. Now select the tab: "Users for Inbound Communication."
5.11. Add a new user and assign them to an existing profile.
Note: We recommend creating a separate profile for incoming communication on your BW Bridge tenant. You do not need to assign the authorizations manually, as they are assigned automatically by SAP when you create communication agreements in the next step.
5.13 Go to the next tab: "Users for Outbound Communication"
5.14 Add a new user and assign them to an existing profile.
Note: The outbound user is a user who must be created in the source system (in our case, in the S4 system). Unlike the inbound user, the outbound user requires the "S_BI-WX_RFC" authorization profile. If the source system is BW or BW/4HANA, the outbound user requires the authorization profile "S_BI-WHM_RFC."
5.14. Finally, press "Save."
6. Connect source system in Eclipse
Process:
6.1. Open your Eclipse modeling tools and log in to your Bridge tenant.
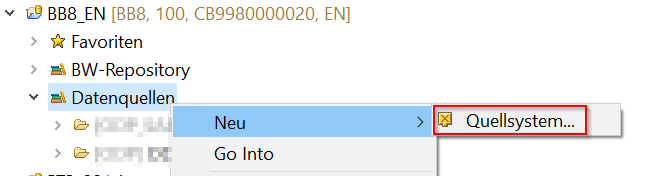
6.2. Create a new source system under the "Data Sources" tree.
6.3. Enter a unique name and press "Continue."
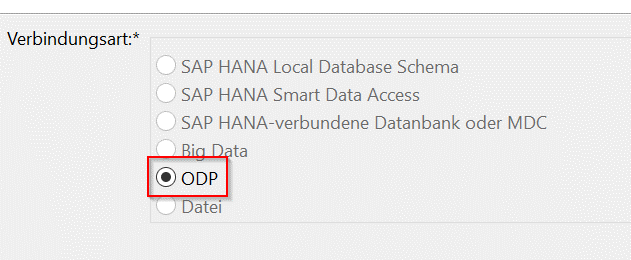
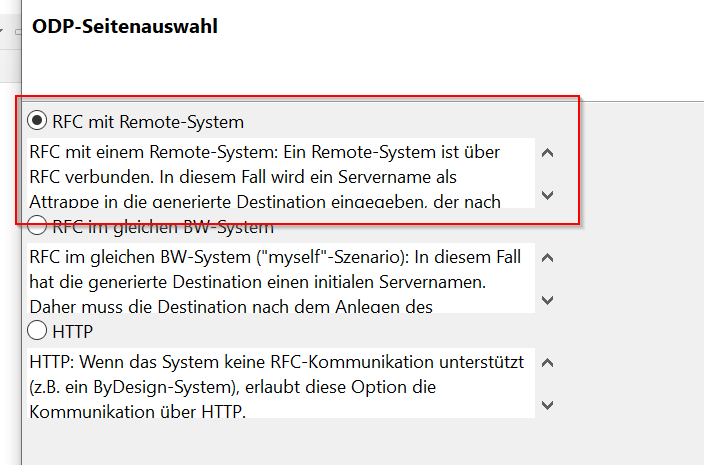
6.4. In our case, we need an ODP connection of the type "RFC with remote system."
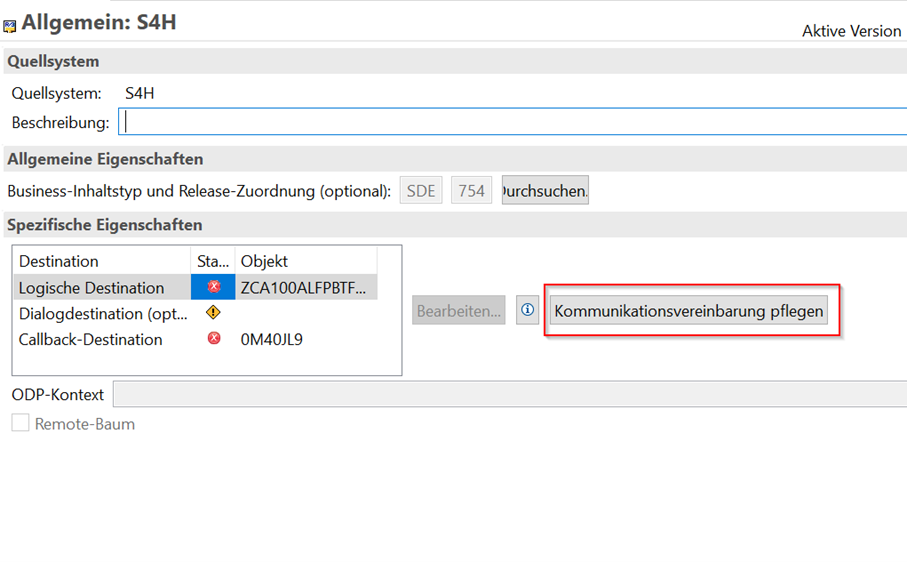
6.5. A new window titled "General" opens in the right-hand container. In the "Specific Properties" field, select "Maintain Communication Agreement."
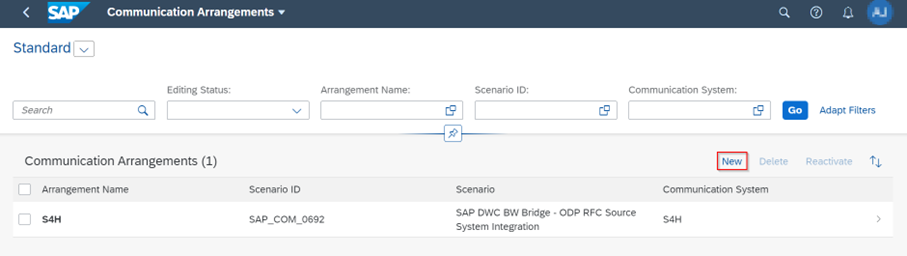
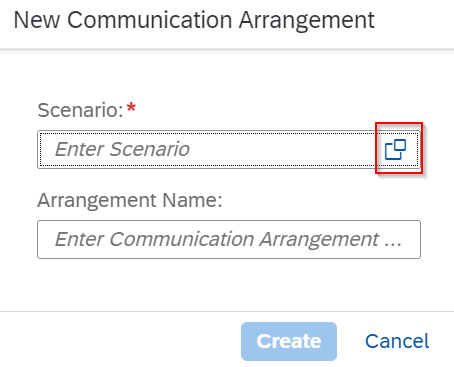
6.6. A new tab will open in your browser, where you will automatically be taken to a Bridge Cockpit application. Click on "New."
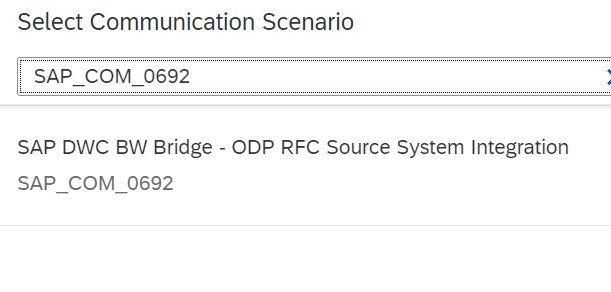
6.7. In the "Scenario" field, search for the communication scenario "SAP_COM_0692."
6.8. Enter the name of your source system as the agreement name and select "Create."
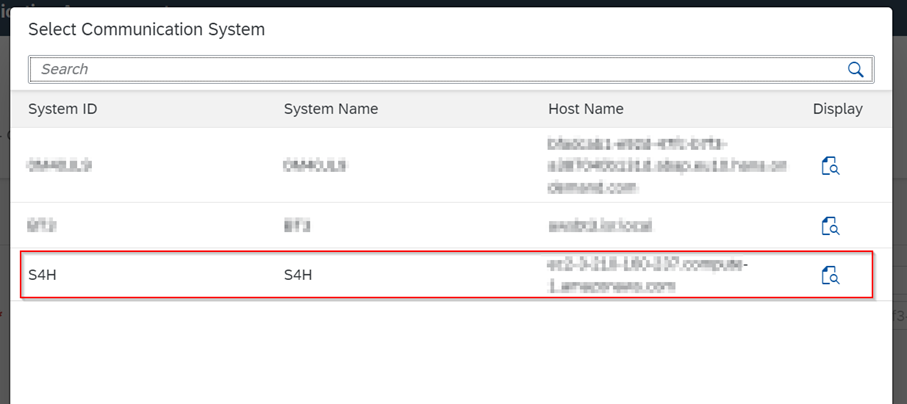
6.9. Under "Common Data," select the communication system you created in step 5. The remaining fields will then be filled in automatically.
6.10. Under "Additional Properties," select the ODP source system you created in step 6.5.
6.11. Press "Save."
Callback destination
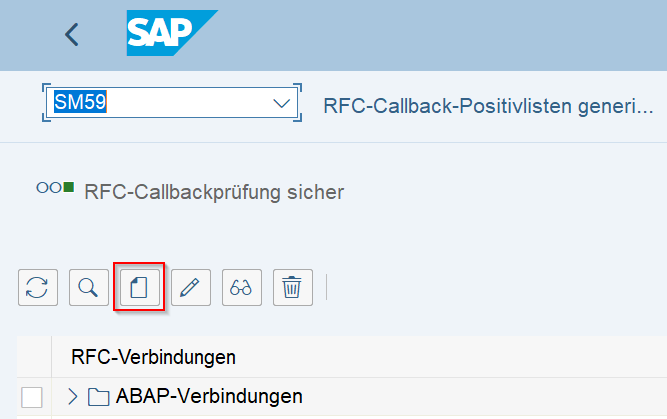
Open your source system and execute transaction "SM59."
Press "Create."
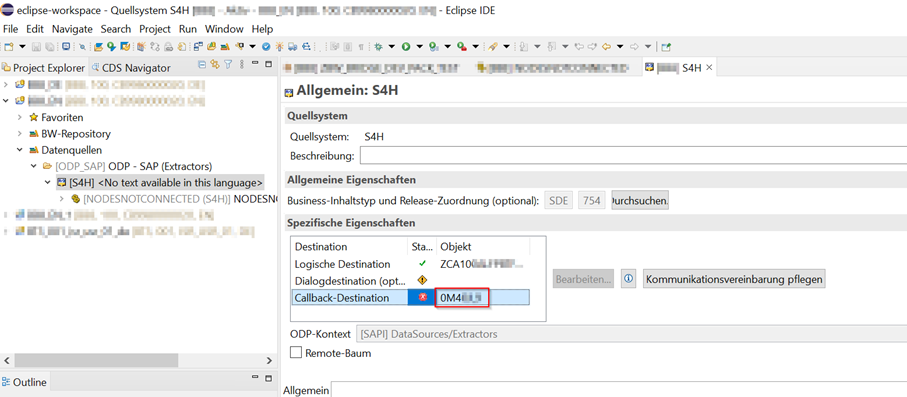
3. At the same time, open your Eclipse environment and copy the address of your callback destination, which is displayed in your created source system.
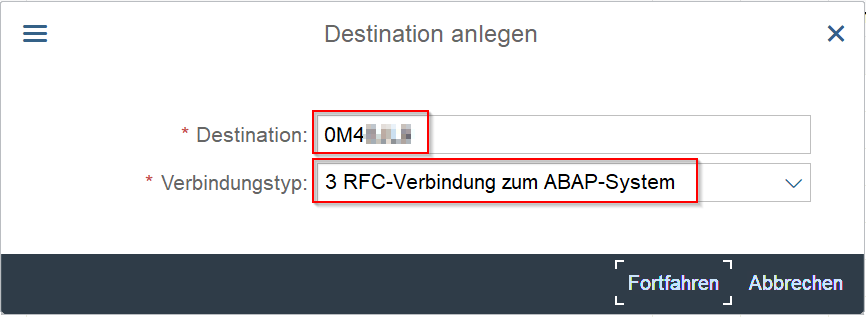
4. Paste the address copied in step 3 into your destination field, select "RFC connection to ABAP system" as the connection type, and then click "Continue."
5. In the "Technical Settings" tab, enter the host name without the port number and without "https://" in the "Target Machine" field. The host name is the host or computer on which the Cloud Connector is configured. If, for example, the Cloud Connector is configured on the local host, enter the IPv4 address of your computer as the target machine and select "IP Address" instead of "Host Name" in the source system. The corresponding computer should be accessible from the public network (possible obstacles: firewall).
6. In the "Instance Number" field, enter the instance number of the service channel.
7. Configure the language and enter "100" as the client.
8. Enter the technical user you created for incoming communication (Inbound User) and press "Save" after entering the password.
9. To test the connection, press the keyboard shortcut "Ctrl + F3."
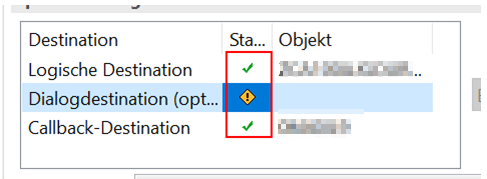
10. If the connection is successful, you can check your Eclipse environment and the callback destination should be marked with a green arrow after restarting the source system and updating the bridge.
Do you have any questions? Feel free to contact us!
Since 1993, we have been operating as IT consultants for Data Analytics and Document Logistics, focusing on data management and process automation. We provide comprehensive support, from strategic IT consulting to specific implementations and solutions, all the way to IT operations, within the framework of holistic Enterprise Information Management (EIM). ISR is part of the CENIT EIM Group.